Having a safe and functional wash bay is an essential element of any barn. It can be outside or inside, though it seems most would prefer inside. Here are some ideas to consider when building or upgrading your wash area.
Wash bays are typically the same size as a stall.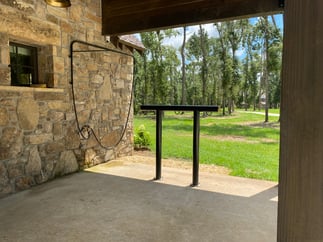 They can be used for many other tasks other that washing – grooming, tacking up, shoeing, vet visits etc. One of the main things you’ll need for your wash bay is access to water. While cold water is sufficient, installing a hot water heater will make your barn a big favorite with anyone who boards there. A wash bay does not have to be inside. In fact, in places with mild winters, most bathing is done in outside wash racks. Regardless if you are indoors or outdoors, there are still some things you must consider. If you are the handy do-it-yourself-er, much of the construction and plumbing can be done by you. But it’s best to have a building contractor look at your plans first – because once you get started, it’s much more difficult to correct any mistakes.
When creating the overall design for your barn, take note and prepare for where you want your wash areas. Since a quick rinse is often done on hot summer days after riding, the bay might be positioned near the tack room. Or to help it dry out more quickly, you may want to put the bay at either end of the stable. Places to not put wash areas are high traffic areas and highly isolated areas. When bathing your horse, you are basically tying him into a 12 x 12 dark, wet area and that can be intimidating for some horses. Good lighting, which we’ll discuss later, is very important.
Once you’ve identified the space, now it’s time to make it as water-resistant as possible. Using metal or water-resistant wood or wood-like paneling will help keep the area dry between baths. Other options are concrete blocks painted with a waterproof sealant or some sort of fiberglass panel.
A non-slip floor with a drain is an absolute necessity. If you are making a wash rack outdoors, this can easily be done by putting several layers of crushed gravel down and allowing the water to simply seep down through the layers. However, for an indoor wash bay, there are more options. While rubber mats and concrete are the two most commonly used, both have their down sides. Concrete is hard on a horse’s legs and can become slippery when wet. Scoring the concrete with grooves will make it less slippery and direct the water more easily to the drain. Stall mats in wash bays are a great option, however they should be removed periodically for occasional cleaning to eliminate mold or mildew and remove any mud or manure that may have collected over time. Another option is to use rubber pavers.
 When designing a wash area, make sure the bay slopes to help keep your horse from standing in water. A general rule of thumb is one inch of slope for every six feet of stall. There are several places to install your drain. One of the most common is right in the middle of the wash bay. But some horses can be spooky and not want to step on that “thing” in the middle of the floor. Be sure you add a removable trap for cleaning. Another option is to put the drains near the back of the bay and use a removable grate.
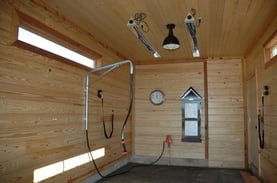
Lights and radiant-heaters are great additions to your wash bay. Infrared heaters can be added to help decrease chill off a wet horse in cool conditions. While heaters work best when installed directly over where the horse will be standing, lights should be installed on either side of the stall ceiling or on the side walls to prevent shadows that could spook a horse. Add shelves or cabinets for common grooming supplies like brushes, shampoo, and/or medical supplies. Look for cabinets made of plastic or metal – wood or laminate can fall apart too easily.
Hoses are a necessary part of any bath but are often the most aggravating part of the process. Some people coil them up after use; others leave them strewn around so your horse has to step over them to get into the bay. The best solution is an “over-the-top washer.” The wash unit keeps the hose above the animal’s head and off the floor, making it easy to move quietly and quickly through the bathing process.
Check out our web site for more wash bay ideas and accessories.